> ## Documentation Index
> Fetch the complete documentation index at: https://docs.covianalytics.com/llms.txt
> Use this file to discover all available pages before exploring further.
# Creating a Control
> Add a new control to your register using the step-by-step wizard.
## Overview
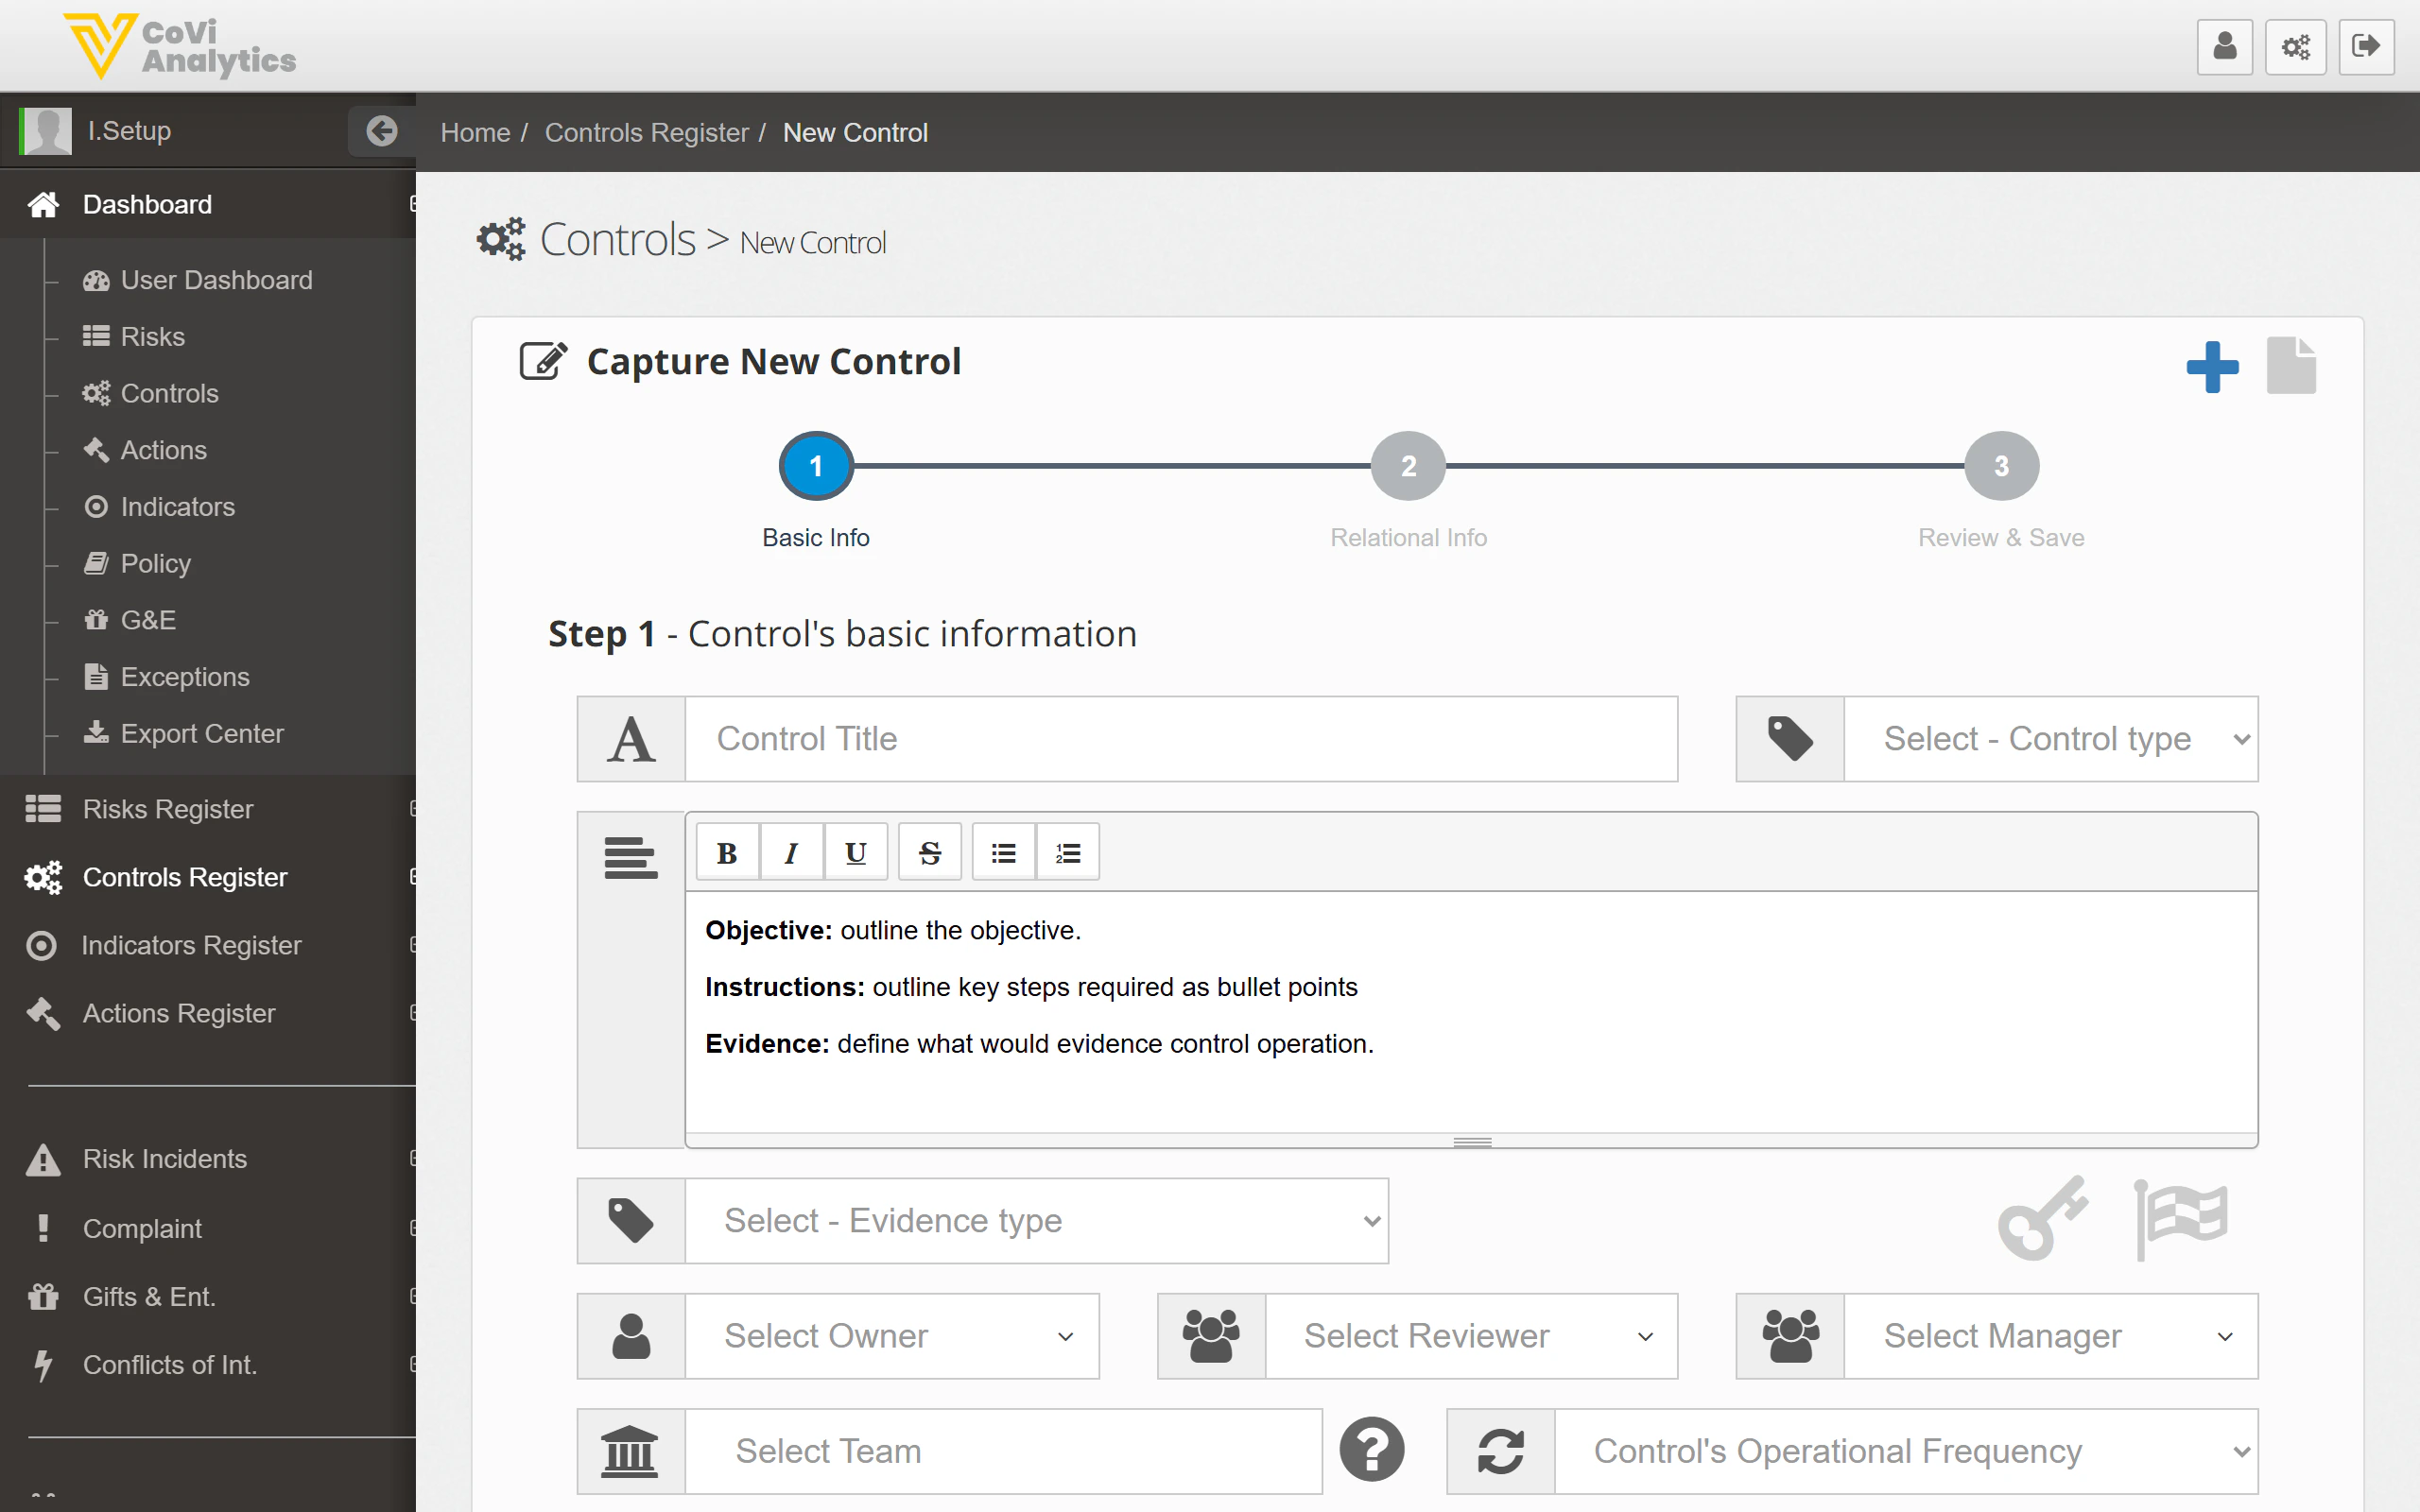
When you need to document a new control — whether it's a new process, a regulatory requirement, or part of a risk mitigation plan — use the New Control wizard. It walks you through three steps to capture all the information needed for a complete control record.
From the sidebar, expand **Controls Register** and click **New Control**. You can also click the green **+** button on the [Control Register](/controls/register) page.
 ## How to use it
### Step 1 — Basic information
This is where you define what the control is and who owns it:
* **Control Title** — give the control a clear, descriptive name
* **Control Type** — select the type (e.g., Preventative, Detective, Corrective)
* **Objective / Instructions / Evidence** — use the text editor to describe:
* What the control is designed to achieve
* The key steps required to perform it
* What evidence would demonstrate the control is operating
* **Evidence Type** — select how evidence is collected
* **Owner** — the person who performs the control day-to-day
* **Reviewer** — the person who reviews the control's effectiveness
* **Manager** — the person with overall accountability
* **Team** — the team responsible for this control
* **Operational Frequency** — how often the control is performed
### Step 2 — Relational information
Link the control to other items in the framework:
* Associate the control with one or more **risks** it mitigates
* Link related **actions**, **indicators**, or **incidents**
### Step 3 — Review and save
Review all the information you've entered. If anything needs changing, use the step indicators at the top to go back. Click **Save** to create the control.
## Tips & Tricks
Write the **Objective** as a single clear sentence. Reviewers and auditors will read this first, so make it count.
Use the **Instructions** field to list the steps as bullet points — the text editor supports numbered and bulleted lists. This makes it much easier for the control owner to follow.
You must select a **Team** and **Entity** before saving. These fields are required and the wizard will not let you proceed without them.
If you're creating several similar controls, complete the first one fully, then use it as a reference for the rest. There is no duplicate feature, but keeping a browser tab open on an existing control card helps.
## How to use it
### Step 1 — Basic information
This is where you define what the control is and who owns it:
* **Control Title** — give the control a clear, descriptive name
* **Control Type** — select the type (e.g., Preventative, Detective, Corrective)
* **Objective / Instructions / Evidence** — use the text editor to describe:
* What the control is designed to achieve
* The key steps required to perform it
* What evidence would demonstrate the control is operating
* **Evidence Type** — select how evidence is collected
* **Owner** — the person who performs the control day-to-day
* **Reviewer** — the person who reviews the control's effectiveness
* **Manager** — the person with overall accountability
* **Team** — the team responsible for this control
* **Operational Frequency** — how often the control is performed
### Step 2 — Relational information
Link the control to other items in the framework:
* Associate the control with one or more **risks** it mitigates
* Link related **actions**, **indicators**, or **incidents**
### Step 3 — Review and save
Review all the information you've entered. If anything needs changing, use the step indicators at the top to go back. Click **Save** to create the control.
## Tips & Tricks
Write the **Objective** as a single clear sentence. Reviewers and auditors will read this first, so make it count.
Use the **Instructions** field to list the steps as bullet points — the text editor supports numbered and bulleted lists. This makes it much easier for the control owner to follow.
You must select a **Team** and **Entity** before saving. These fields are required and the wizard will not let you proceed without them.
If you're creating several similar controls, complete the first one fully, then use it as a reference for the rest. There is no duplicate feature, but keeping a browser tab open on an existing control card helps.