Overview
The User Management page is where administrators control who has access to CORE and what they can do within it. From here you can invite new users, assign roles, manage permissions at a granular level, and enable or disable accounts. This page is found under Settings > Users Management.How to use it
Tabs
The page is organised into three tabs:- User Register — The main user directory where you manage accounts.
- User Activities — An audit trail of user actions within the platform.
- Enhanced ACL — Advanced access control lists for fine-grained permission management. See Enhanced ACL for full details.
User Register
The User Register tab is your primary view for managing accounts.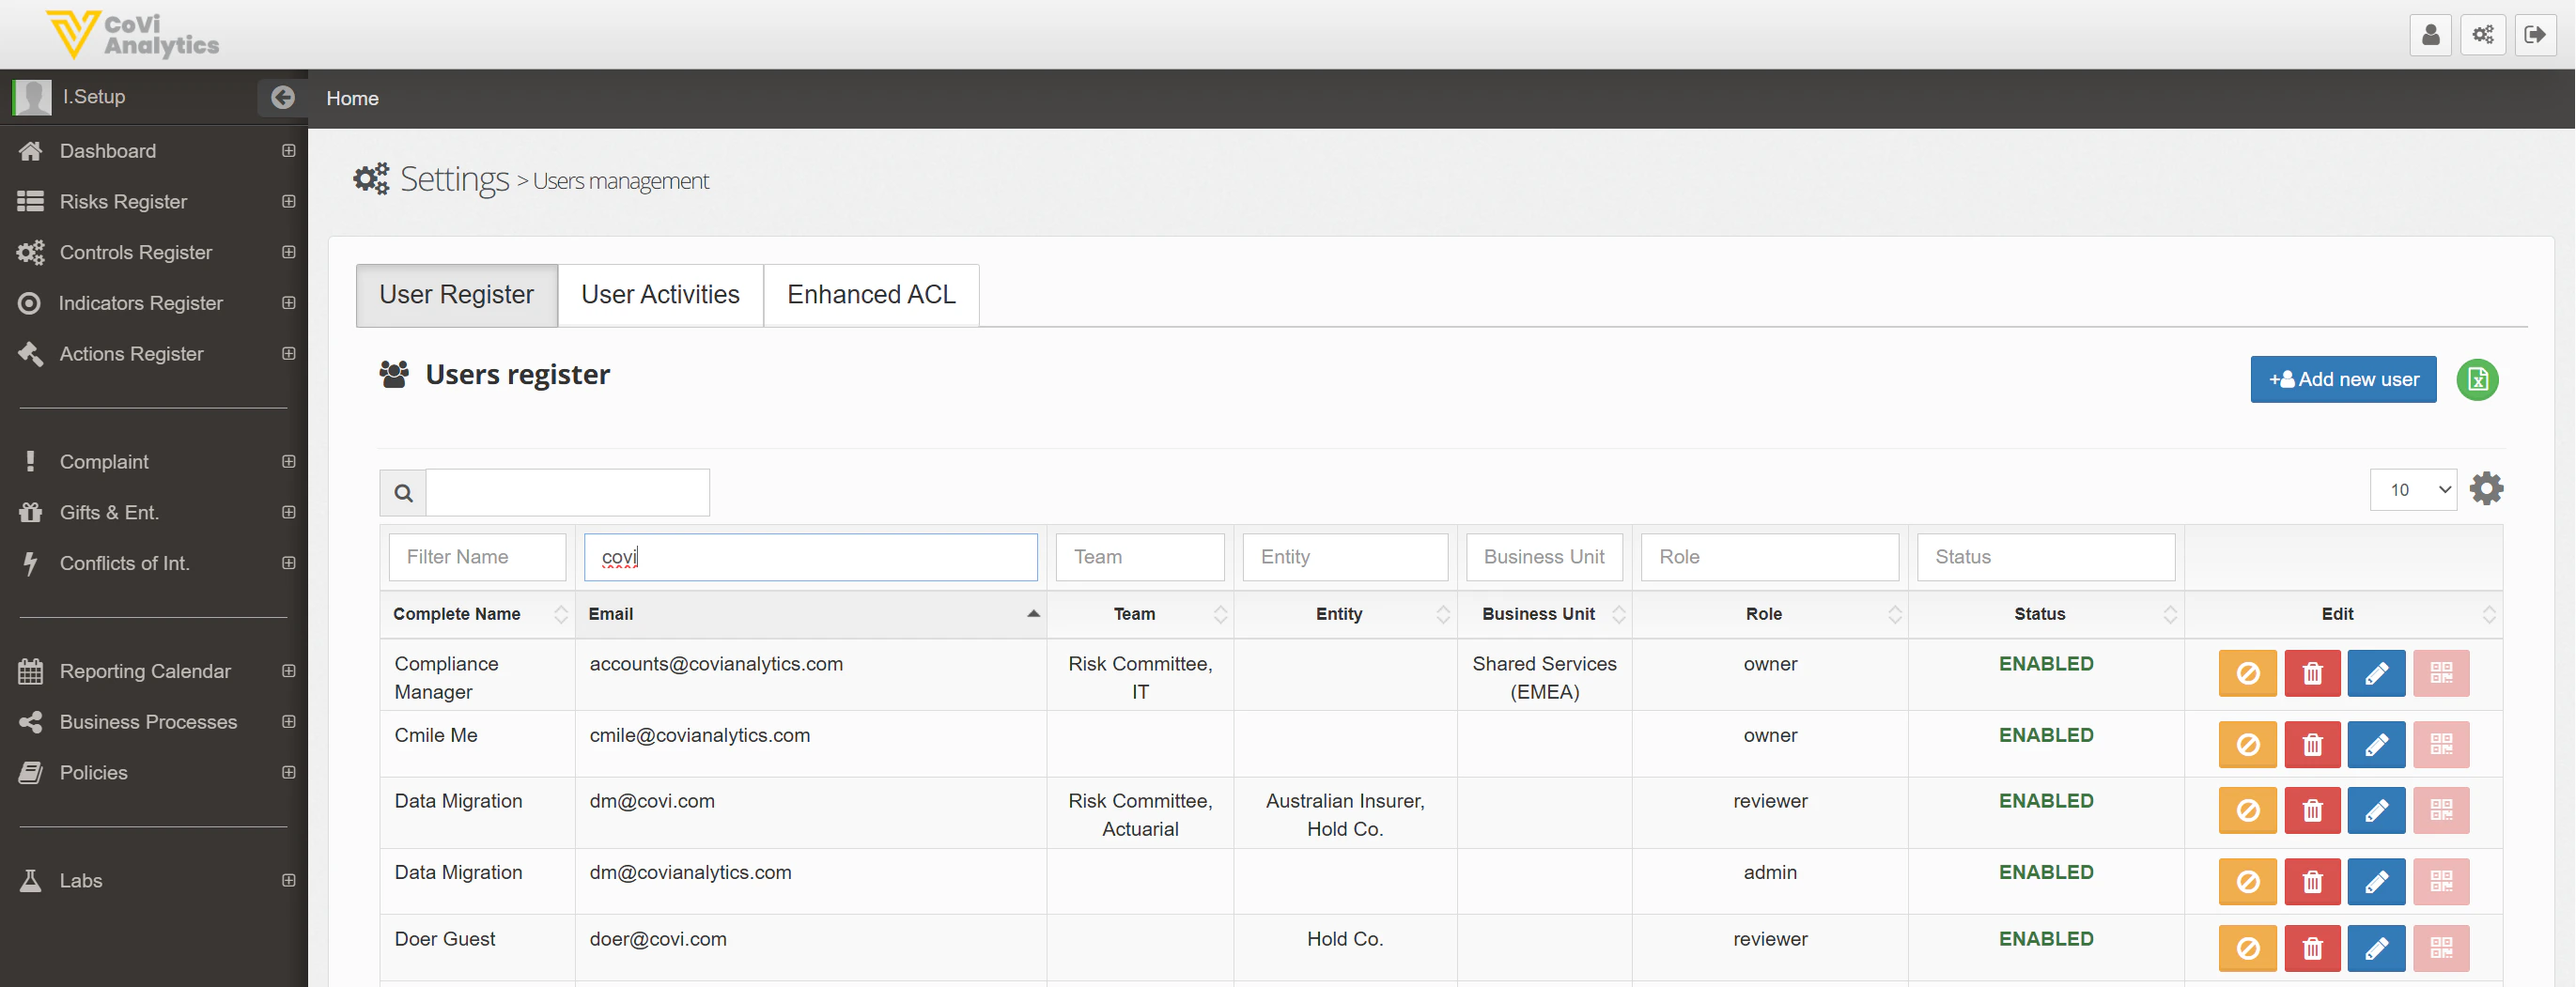
- Complete Name — The user’s full name.
- Email — The user’s email address (used for login).
- Team — The team the user belongs to.
- Entity — The legal entity the user is associated with.
- Business Unit — The business unit the user sits within.
- Role — The role assigned to the user, which determines their default permissions.
- Status — Whether the account is ENABLED (active) or DISABLED (suspended).
- Edit — A set of action buttons for each user, including options to edit their profile, manage permissions, reset their password, and disable the account.
Adding a new user
Click the green Add new user button above the table. You will need to provide the user’s name, email address, team, entity, business unit, and role. Once created, the user will receive an invitation to set up their account.Filtering and searching
Use the search box to find a user by name or email. The filter row beneath the column headers lets you filter by Name, Email, Team, Entity, Business Unit, Role, or Status.Managing an existing user
Each row includes coloured action buttons in the Edit column:- Edit — Update the user’s profile details, team assignment, or role.
- Permissions — View and modify the user’s specific permissions beyond their role defaults.
- Reset — Send a password reset link to the user’s email address.
- Disable — Suspend the user’s access without deleting their account. Disabled users cannot log in but their data and audit history are preserved.
Rows per page
Use the rows-per-page selector at the bottom of the table to control how many users are shown at once. The settings gear icon provides additional display options.Tips & Tricks
Role definitions and the permissions associated with each role are managed in Configuration. If you need a new role or want to adjust what an existing role can do, speak to your system administrator.